wesdotphotography.com
visit us:
  • Home
  • Autos and Vehicles
  • Nature and Animals
    • Animals >
      • Animals
      • Canines
      • Cats
    • Birds >
      • Birds
      • Eagles and Osprey
      • Hummingbirds
      • Owls
      • Tall Birds
    • Equine >
      • Everything Horses
      • Lipizzans
      • Wild Horses
    • Flora
  • Pacific NW
    • Japanese Gardens
    • Mountains
    • Night Skies
    • Ocean
    • Pacific Northwest
    • Portland
    • Waterfalls and Streams
  • People
  • Travels
    • Alaska
    • California
    • Desert Southwest
    • France
    • Northeast
    • Rocky Mountain States
    • Yellowstone and Tetons
  • Unique Art
    • Abstracts
    • Triptychs
  • About Us
    • Blog
    • Forum
    • Contact Us
    • Legal

How to Create a Photo with a De-Saturated Border

2/24/2012

4 Comments

 
Picture
 
These instructions are for a PC using Adobe Photoshop CS5
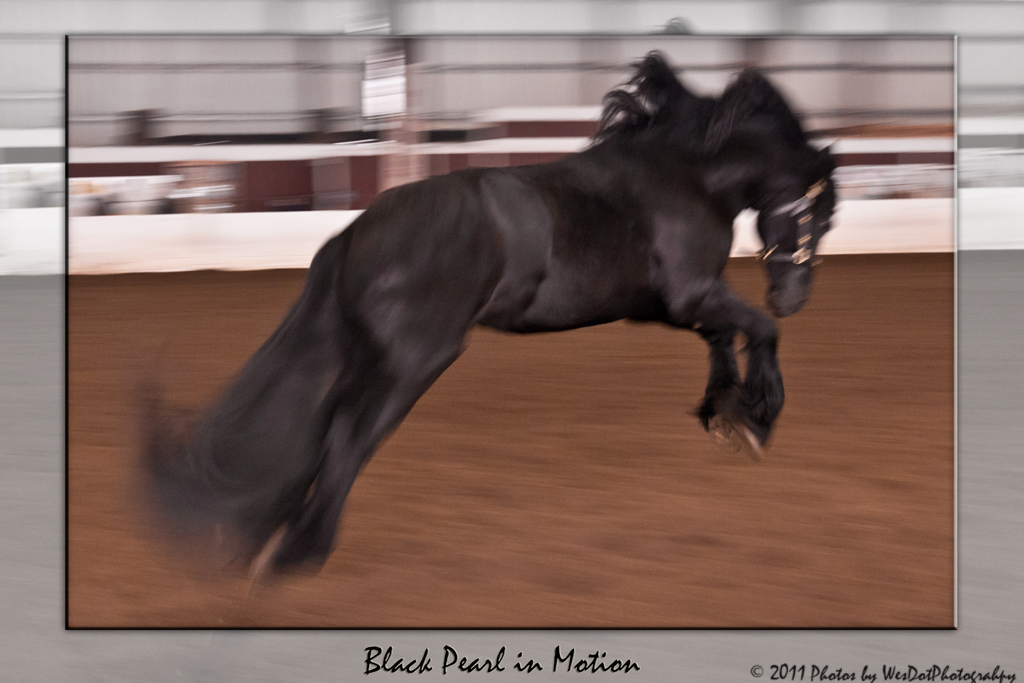
One of the many joys of Photoshop or any other photo editing software are the many things you do do with your images to make them even more uniquely 'yours'.  By the way, this image was taken in a large arena of a beautiful Friesian horse.  The arena was quite dark and I was using a low ISO and a slow shutter speed.  Giving the horse this rather abstract, flowing look.

  1. Open Image you want to add this type of border.
  2. Duplicate the background layer by using Control J.  This will create a duplicate layer of the original image in your layer palette.
  3. With the newly created duplicate layer highlighted/active click in the Edit drop downs.  Click on Free Transform….click Alt-Shift & drag handle towards the center to make the border…press enter to commit when you are happy with the size.  
  4. Now click on Background layer to make it active….Click on the Hue & Saturation adjustment layer.  Lower saturation & increase lightness to your liking.
  5. Click on the scaled down photo layer (should be the top layer) and use Layer Effects to your liking.  I like the drop shadow, inner glow, and bevel & emboss.  These can all be adjusted individually in the Layer Styles box.
  6. Before flattening you can also move the scaled down photo layer if you want to align the background layer to line up objects by clicking on the Move Tool.  
  7. If you want add some text in the border, select the Hue and Saturation layer you created directly above the Background layer.
  8. Select the Text tool and click in the border where you want the text to appear.  Using the background color you select and font type your caption.  I then use the Layer Effects to your liking.  
  9. The last step is to flatten your image and do a Save As.  I always do a 'Save As' so the original image is left unaltered.

4 Comments
search here link
4/28/2013 09:44:16 pm

I love your page. There are many talented aspiring photographers but due to lack of guidance they fall to achieve the art in photography. Thank you so much for the sharing as it has helped me and many readers to learn the art. Keep up your good work.

Reply
Dotty Weber link
4/29/2013 10:12:59 am

Thanks for your wonderful comments. I really love hearing that my blog is helpful as I love sharing what I have learned along the way!

Reply
Gimp free link
6/10/2013 05:22:04 pm

The details and also the aspect have been simply superb. I do think that your particular perspective is usually deeply, it’s simply properly planned along with truly extraordinary to find out somebody whom is aware of how to placed these kind of feelings and so properly. Good work!

Reply
Dotty link
6/11/2013 01:52:28 am

Thank you for taking the time to check out our Blog and taking the time to respond. It's always great to hear we are on the right track and others are enjoying our images and tips.
Thanks again,
Dotty
www.wesdotphotography.com

Reply

Your comment will be posted after it is approved.


Leave a Reply.

    Our Flickr Photos

    Author

    Name:
    Wes & Dotty Weber

    Occupation:
    Photographers at Heart

    Favorite Camera:
    Canon  5DMarkIII and Canon 7DMarkII

    Favorite Subjects:
    Absolutely everything.

    Favorite Vacation Spot:
    Everywhere we’ve been has it’s own special beauty and some places like Yellowstone National Park and the Desert Southwest can be unlike anywhere else.  But to name a favorite is hard as we’ve not seen everything, yet.  

    Personal Motto:
    "Everywhere you look is a great image if you look closely”


    Archives

    May 2023
    April 2023
    April 2022
    November 2018
    January 2018
    November 2016
    December 2015
    July 2015
    January 2015
    February 2014
    November 2013
    July 2013
    June 2013
    May 2013
    February 2013
    January 2013
    November 2012
    September 2012
    August 2012
    March 2012
    February 2012
    December 2011
    October 2011

    RSS Feed

    Categories

    All
    Canvas
    Commerce
    Domain
    Email
    Fine Art America
    Framed
    Gallery Wraps
    Greeting Cards
    New
    Outage
    Prints
    Registrar
    Shopping
    Website
    Weekly
    Wesdotphotography

Copyright © Since 2000, WesDotPhotography All Rights Reserved.