Here is a different image before the Preset was added:
I will try to do more tutorials as I find things that I also want to remember and use.
Thank you for your support.
| wesdotphotography.com |
|
|
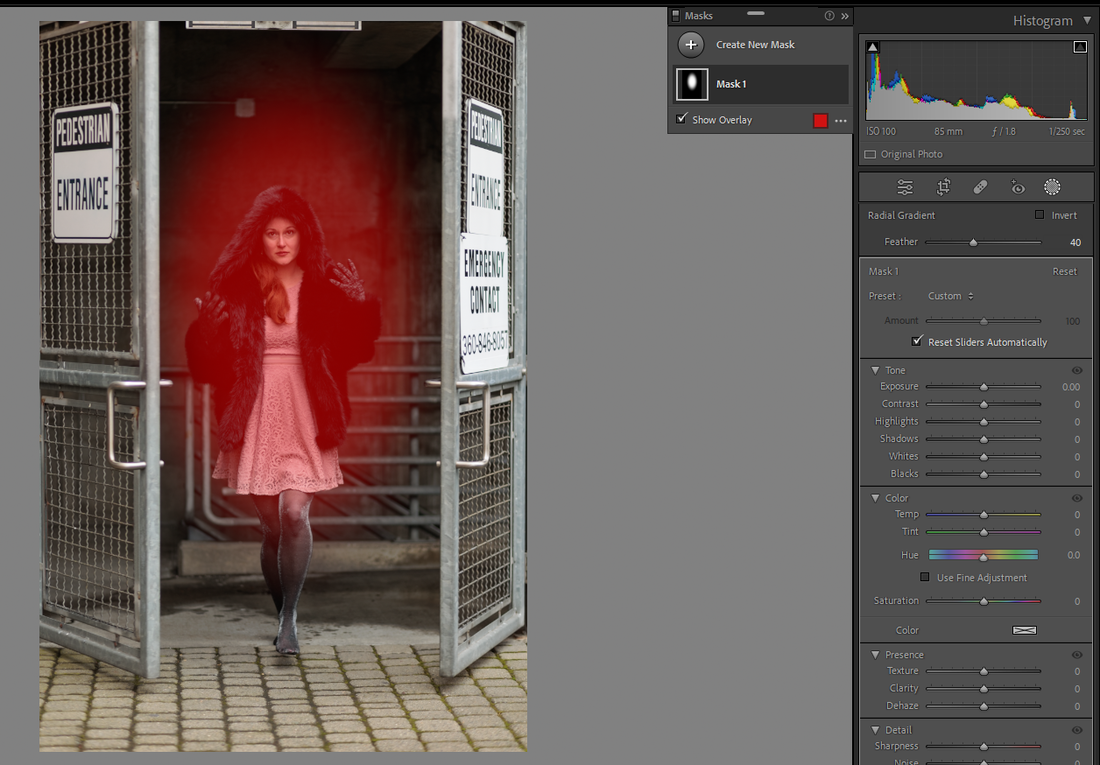
Here is the original image: First Step is to add a Radial Gradient mask.  Then click and drag the Radial Gradient mask to your liking. The mask area will show as red. Then change the lighting to either darken or lighten. In this case it is lighten. To make the light show only behind the girl click on Mask 1, then click on subtract which will bring a drop down box. Click on 'Select Subject' not 'Select People'. If there was a prop like a chair or if she is holding something it will not be selected in the mask unless you 'Select Subject'. Now the subject is no longer lit by the Radial Gradient but the area behind her is. At this stage save as a Preset so it can be used on other images. Rename it something like 1.Light behind Subject, select 'User Presets' as Group and only check Masking. I add the '1' to the Preset name so it will be at the top of my list. It can always be renamed after it is saved if you want to. The size, shape, and placement of the mask can be changed by clicking on the mask in the image and making your adjustments to taste. You can also make many other changes to the mask like seen below: And since the first steps before adjustments have been saved as a Preset it can now be added to other images and all the same adjustments as shown above can be made. Here is a different image before the Preset was added: And the same image after adding the Preset by one click and then making some adjustments to show the difference. Thank you for taking the time to check out my tutorial. And if you enjoyed it please comment and follow my Facebook page where I will be posting a link to my Blog.
I will try to do more tutorials as I find things that I also want to remember and use. Thank you for your support.
0 Comments
|
Our Flickr PhotosAuthorName: Archives
July 2024
Categories
All
|