|
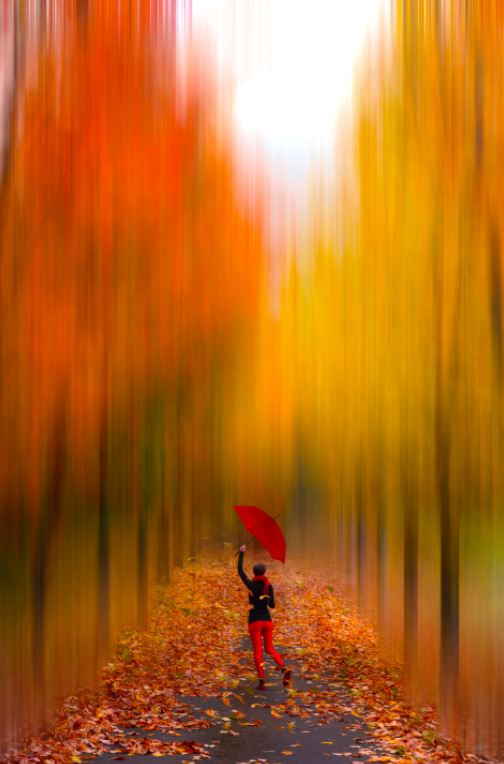
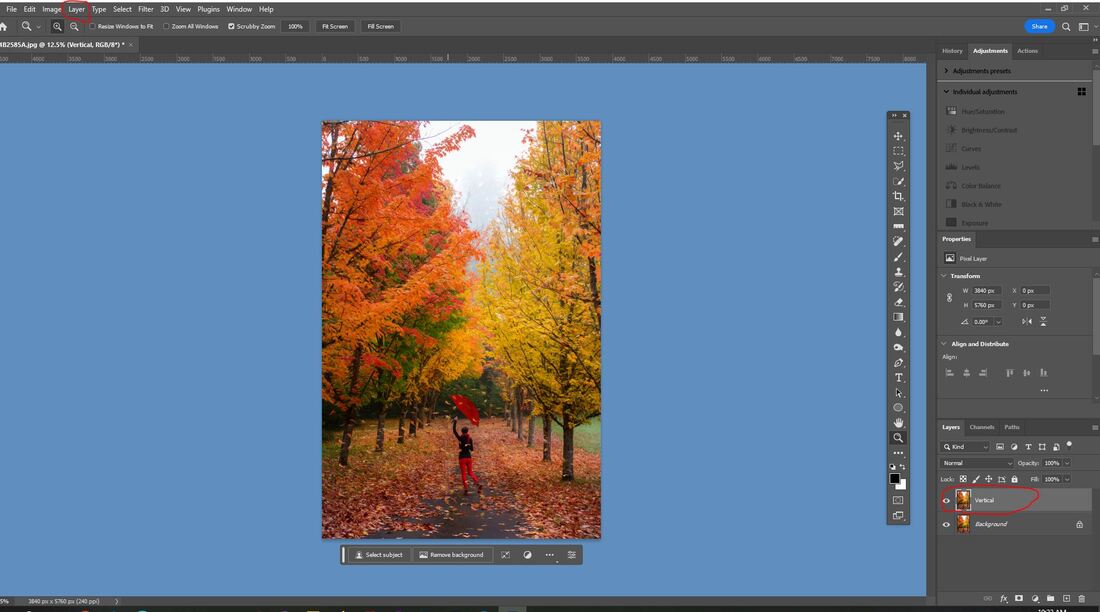
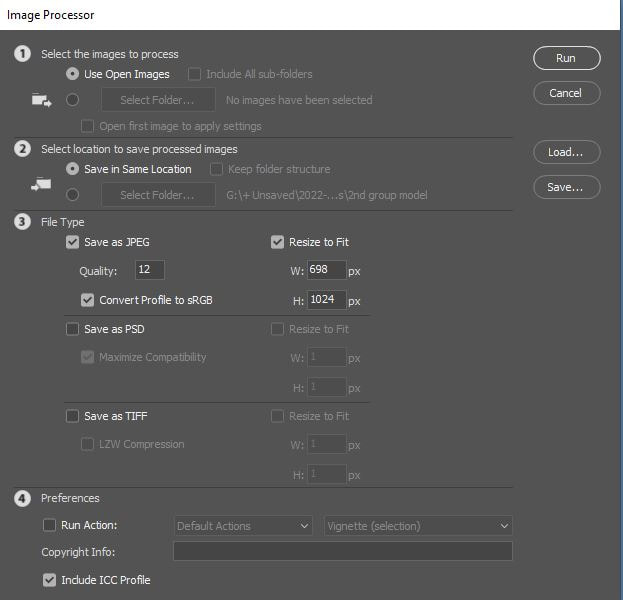
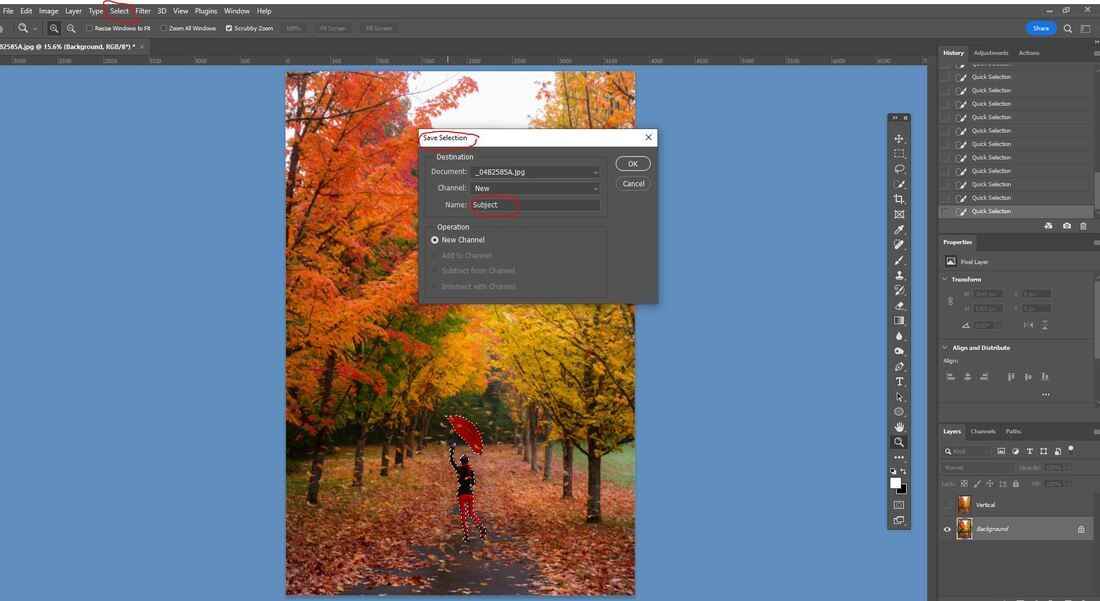
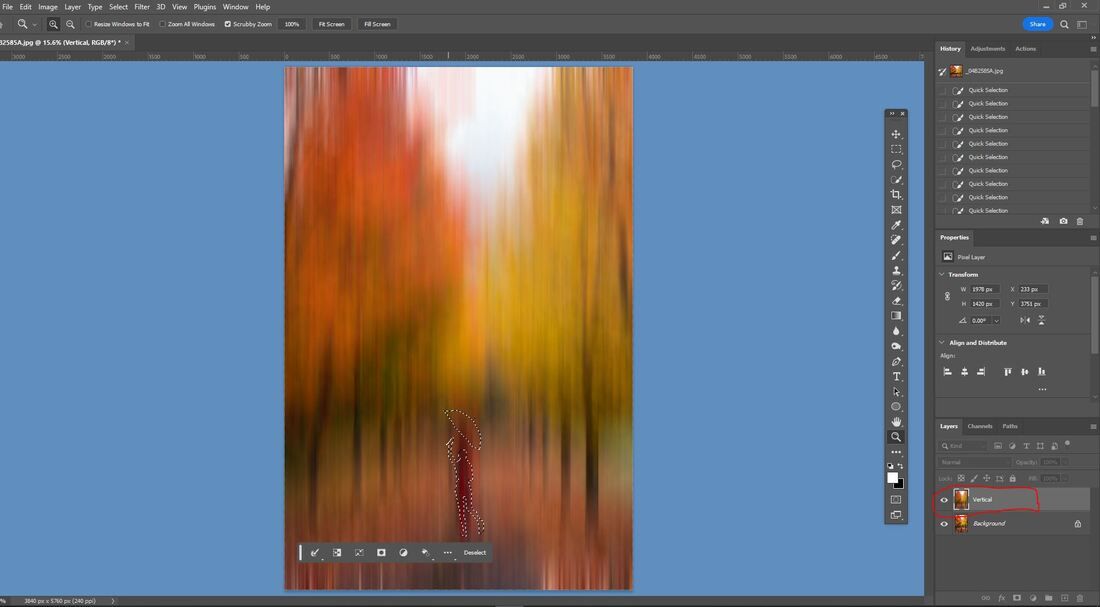
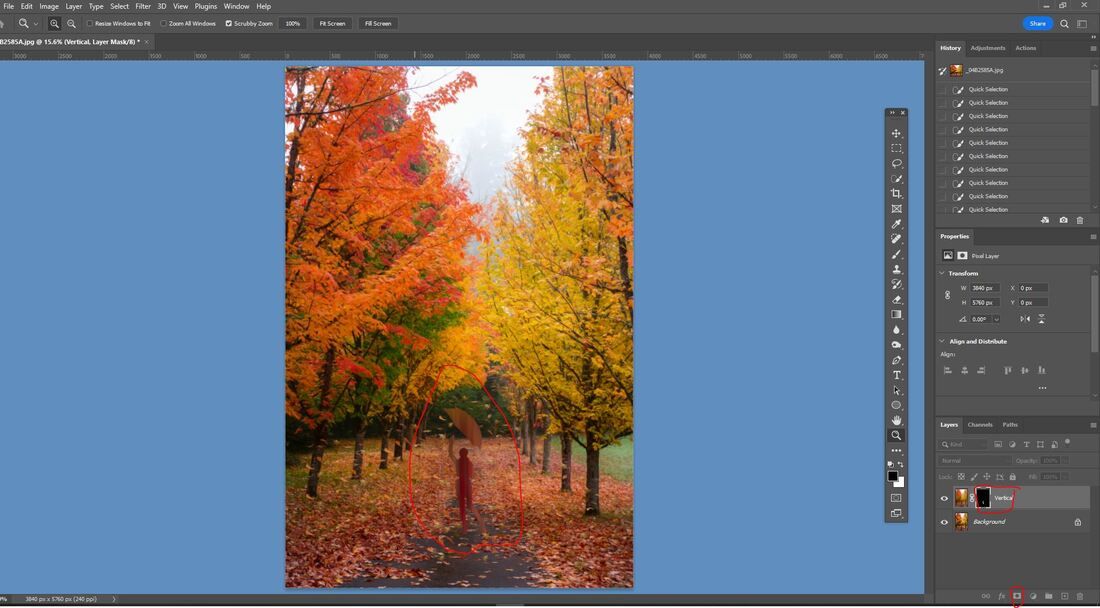
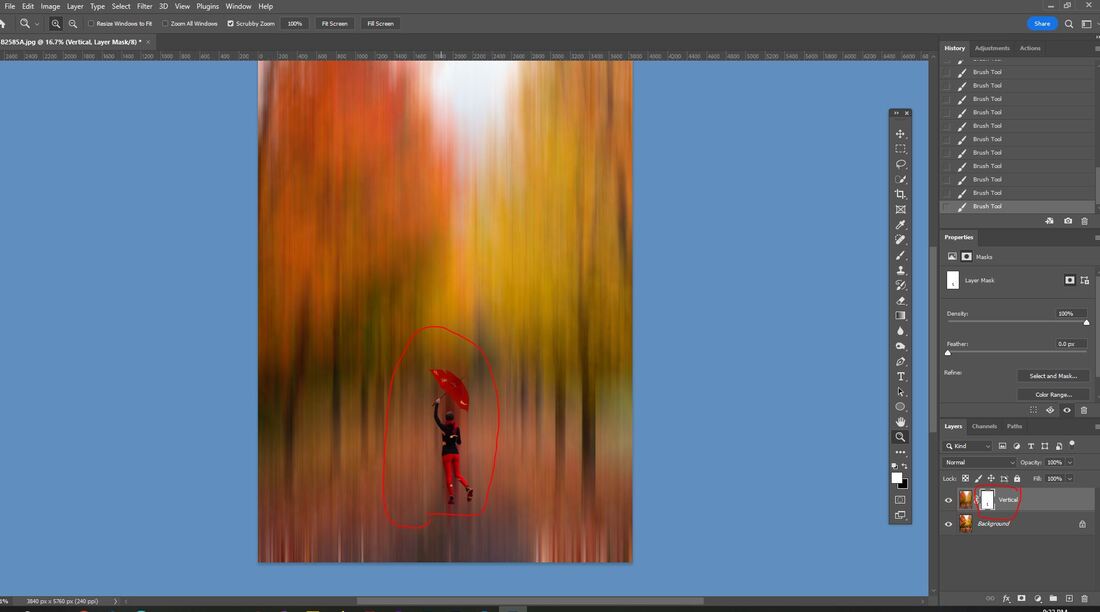
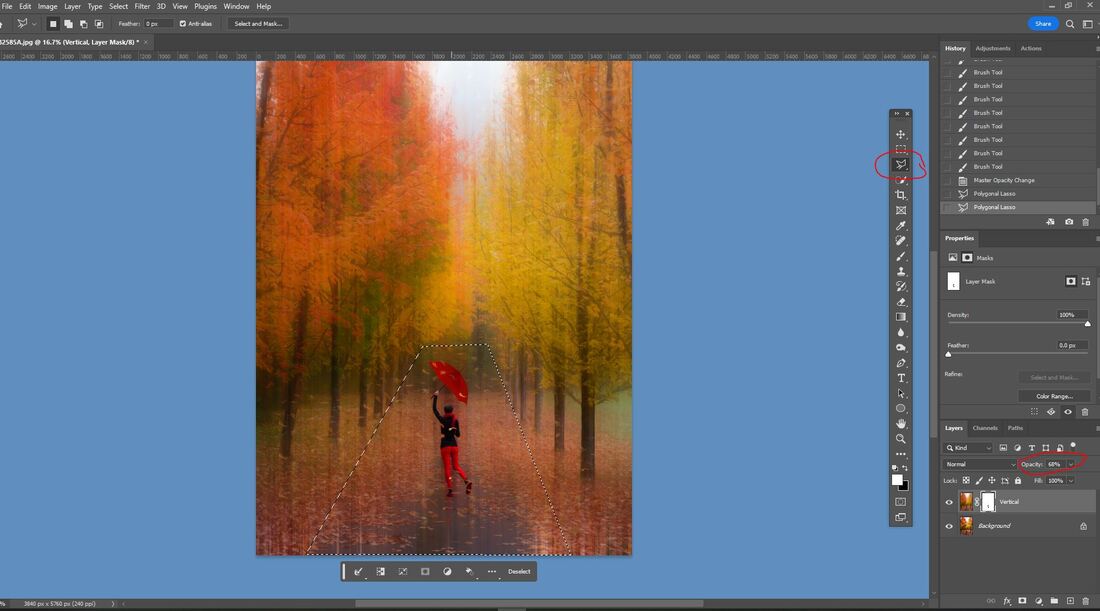
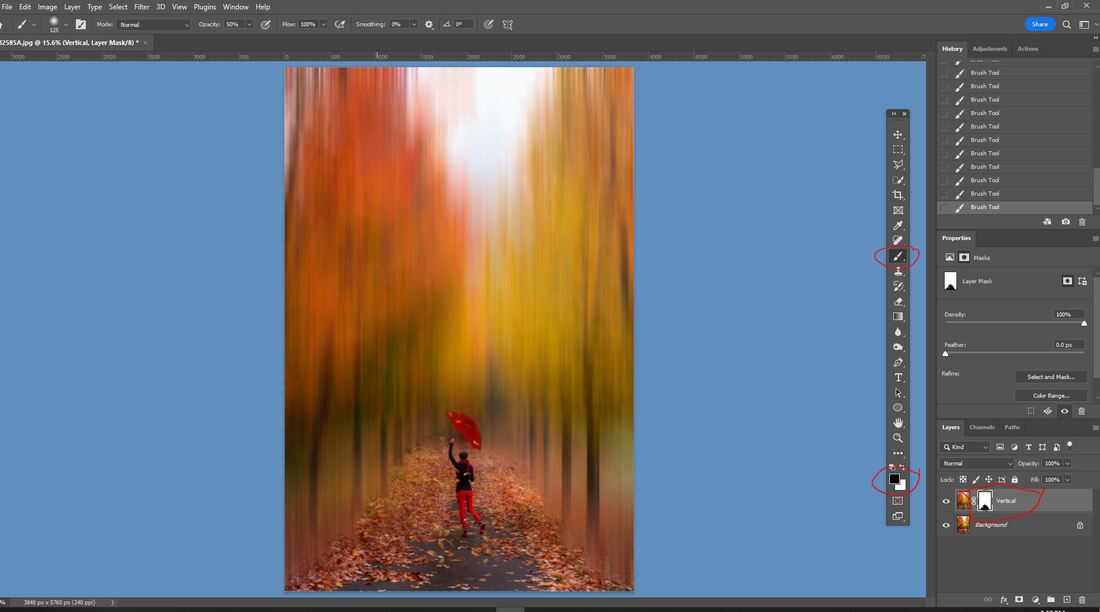
This is a slightly more difficult version of applying the Adamski Effect to an image as it includes a person. Most of the steps are similar to in Part I but there are some variations and additional steps. First step is to create a duplicated layer from the background layer. To do this right click on the background layer and select Duplicate Layer or with the PC keyboard shortcut do a Control J. As I am only doing a vertical blur with image there is only one duplicated layer which will be renamed 'vertical'. With the Vertical layer selected go to the Filter Tab, from the drop down box select Blur then Motion Blur. Type -90 in the Angle field to make the blur vertical. I will use 840 in the Distance slider for this image. This is purely your choice. The higher the number the more blur. Then click OK. Click on the icon next to the Vertical layer to make it not visible. Then select the Background layer and click on Select then Subject. This will select the person in this image and does a pretty good job. It would be useful to zoom in and do any touch up needed. Then click on Select and Save Selection, naming it Subject and click on OK. Click on the Vertical layer which will make it visible again and you will see the subject is still selected. Add a Layer Mask by clicking the icon in the bottom of the Layers Palette. The mask is black which is hiding the subject. To change the blur from the Subject to the Background click on the black Layer Mask and do the PC keyboard shortcut Control I to invert the mask. Zoom in close to again do any touch up. Lower the opacity on the Vertical Layer so you can see the background. Then using the Polygonal Tool select the area that you want to reveal. Using a large soft black brush set the Opacity to 10-15%. Start brushing on the Mask at the bottom and brush towards the top until you have the look you want. The effect will be contained within the selected area framed by the 'marching ants'. The bottom should be black and fading to gray towards the top of the selection. Deselect the Polygonal selection and lower the opacity of the layer. Using a smaller soft black brush brush along the edges of the blurred area and the leaves. Toggle between the black brush to reveal and the white brush to bring the blur back if you've removed too much. Also toggle between a lower opacity and 100% opacity to see the progress. This is probably the most time consuming part of the edit. From here I flattened the layers and then duplicated the background layer to remove the leaves from the umbrella. I found them way too distracting. Here is the finished project.
0 Comments
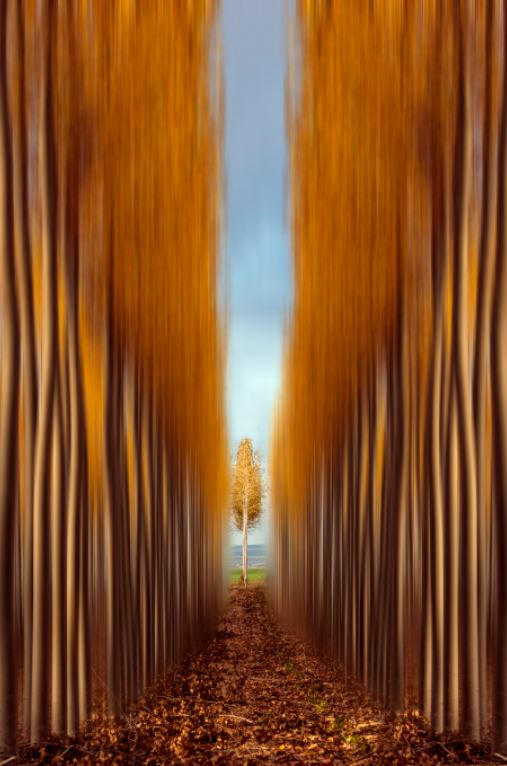
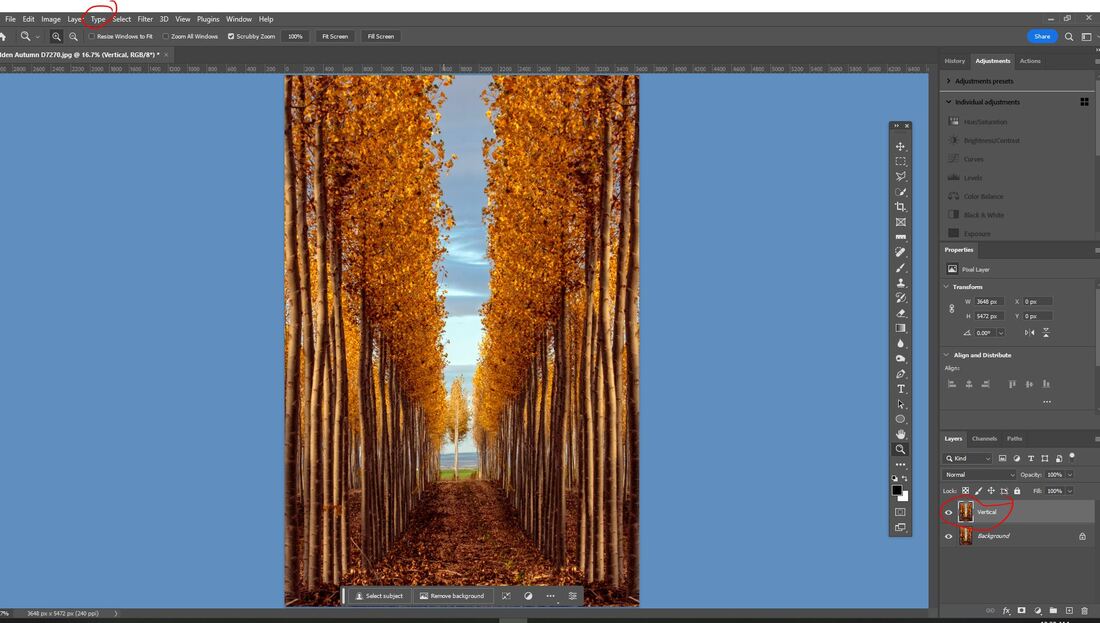
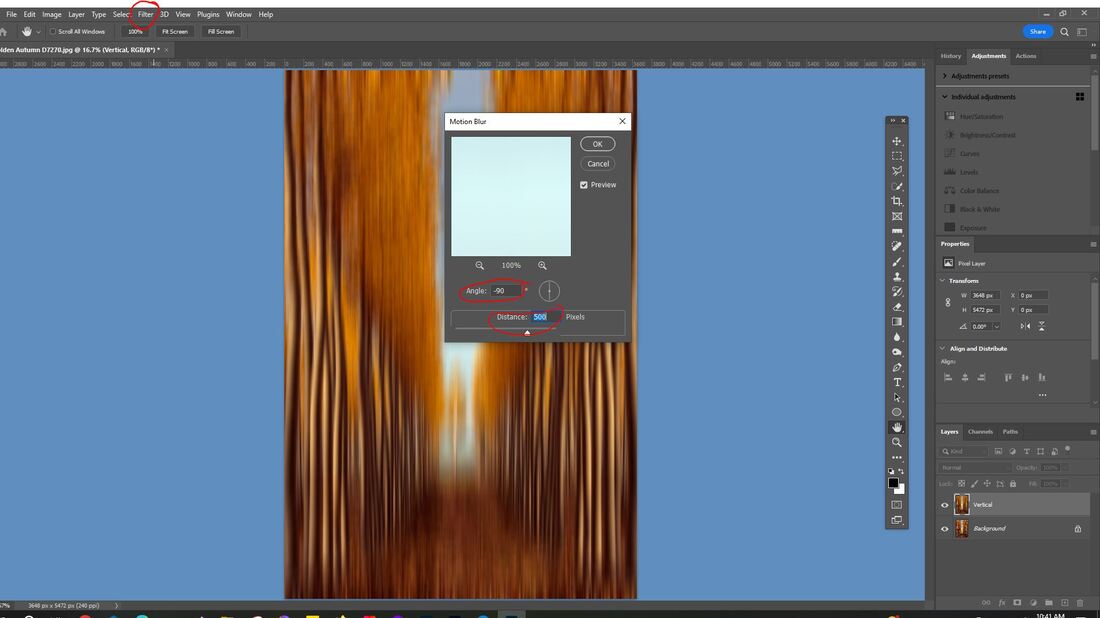
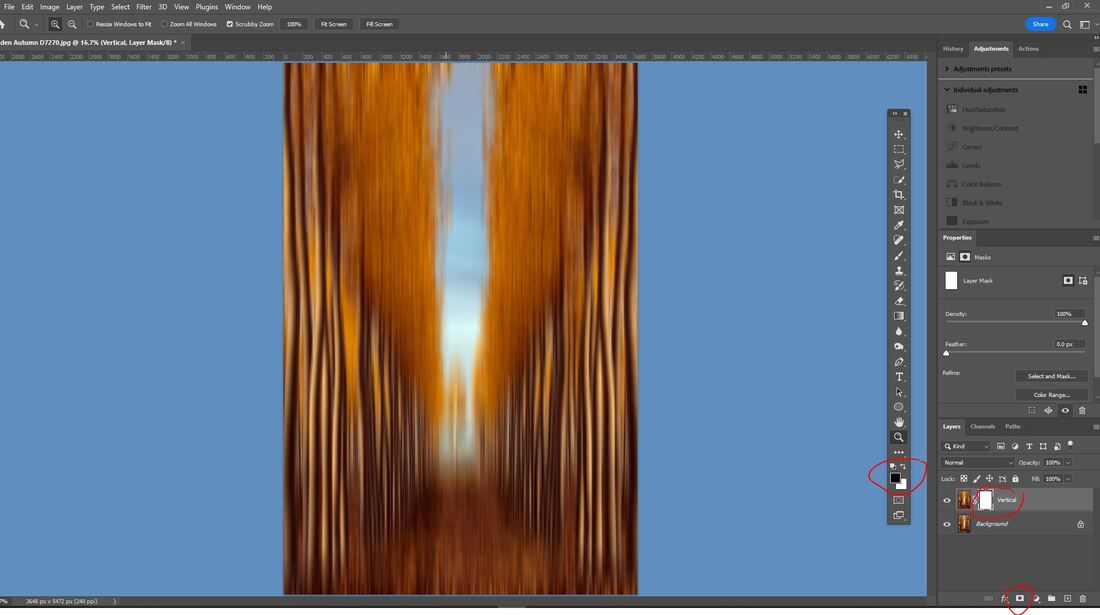
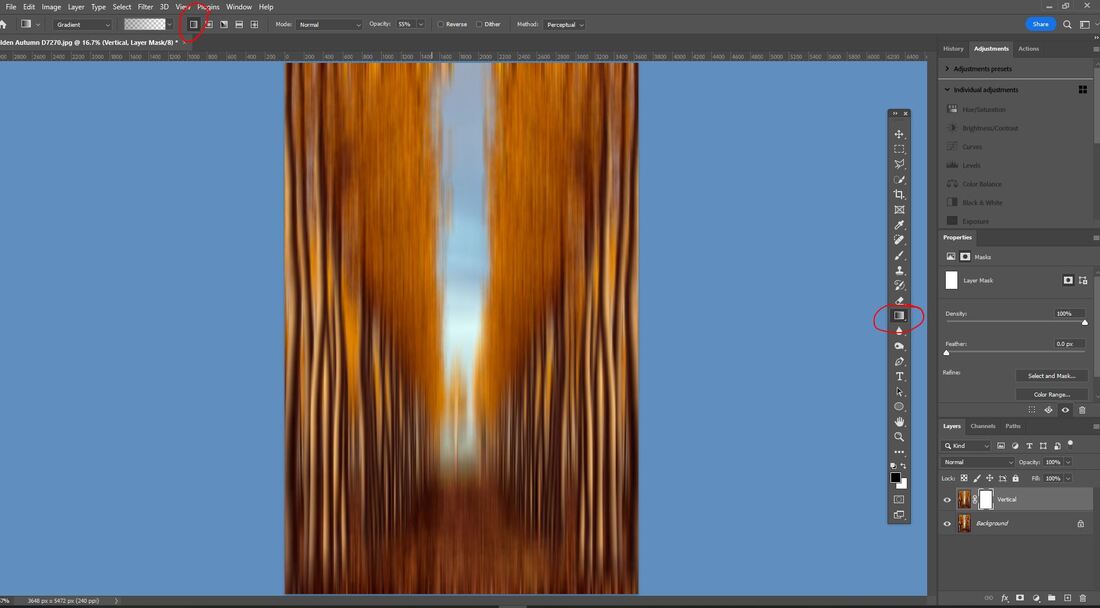
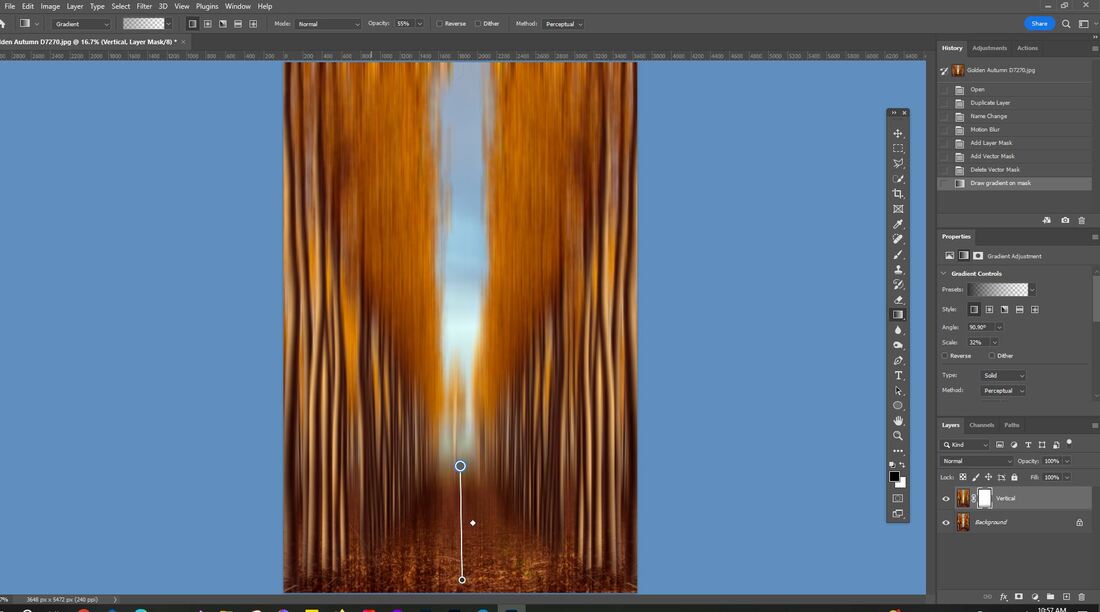
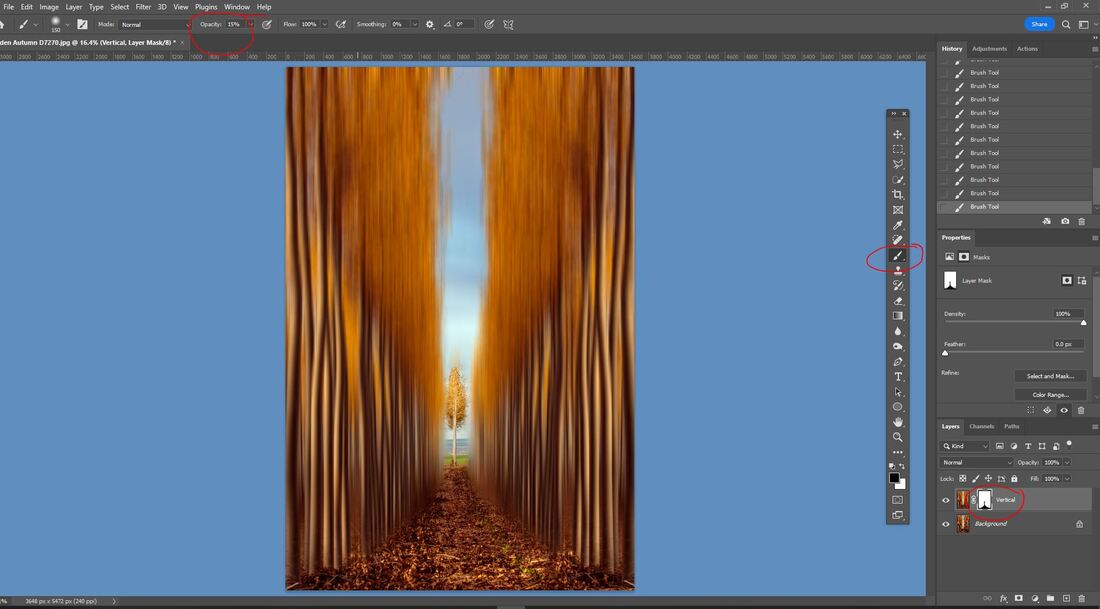
First step is to create a duplicated layer from the background layer. To do this right click on the background layer and select Duplicate Layer or with the PC keyboard shortcut do a Control J. As I am only doing a vertical blur there is only one duplicated layer which will be renamed 'vertical'. With the Vertical layer selected go to the Filter Tab, from the drop down box select Blur then Motion Blur. Type -90 in the Angle field to make the blur vertical. I will use 500 in the Distance slider for this image. This is purely your choice. The higher the number the more blur. Then click OK. Add a Layer Mask by clicking the icon in the bottom of the Layers Palette. The mask should be white and the foreground color palette should be black. Select the Gradient Tool in the tools bar or with the PC keyboard press the letter 'G'. Make sure the 1st Icon next to the Gradient bar is selected. It is called the Linear Gradient. Making sure the Mask is selected on the Vertical layer hold the Shift key and click near the middle bottom of the image and drag up a slowly to maybe an inch or so. You will see the lower portion of the image being revealed. Using a large soft black brush set the Opacity to 10-15%. Start brushing on the Mask at the bottom and brush towards the top until you have the look you want. The bottom should be black and fading to gray towards the top of the selection. Continue brushing along the edges of the blurred area and the trees. Toggle between the black brush to reveal and the white brush to bring the blur back if you've removed too much. Also toggle between a lower opacity and 100% opacity to see the progress. This is probably the most time consuming part of the edit. Flatten the layers and do a Save As naming the file. Here is the finished project.
|
Our Flickr PhotosAuthorName: Archives
July 2024
Categories
All
|

 RSS Feed