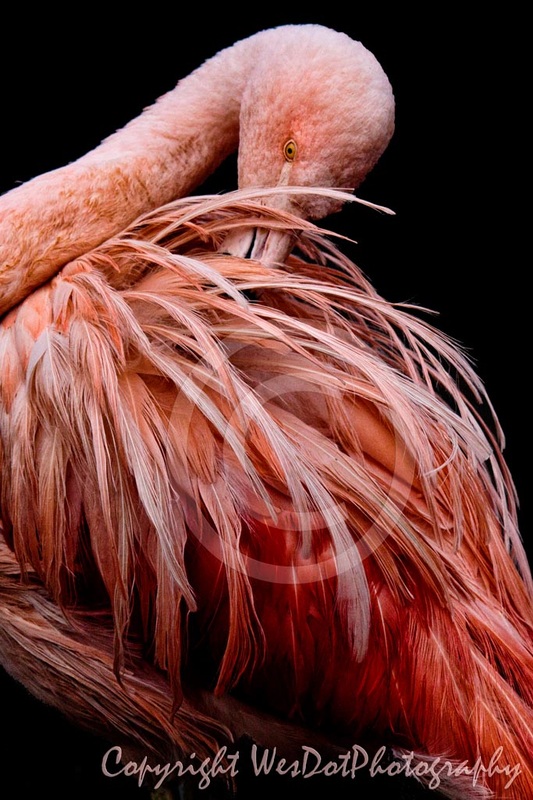
If you would like to use this method I've given step by step instructions for you to create your own action to do this below:
- Open an image with a portrait format as mine above is.
- From the Window Tool Bar at the top of your Photoshop CS screen drop down click on Actions. This will open the Actions box. (This step will create an Action that you can have Photoshop add your copyright automatically)
- Click on the 5th icon at the bottom of the Actions palette which looks like a folder with a box in the bottom left hand side. It will bring up a box called 'New Action'. I named this Copyright Portrait and then click on 'Record'. Now each step that you take will be recorded into this new action.
- In your Toolbar on the left hand side of your screen right click on the Icon that is the 2nd Icon above the magnifying glass. You want to bring up the Custom Shape tool. The icon looks like a weird star with rounded corners.
- In the Tool Bar at the top of the screen Click on the 3rd icon in the box next to that weird star. If you scroll your cursor over this icon it is called a Fill Pixels icon.
- Still at the top of the screen click in the drop down arrow to the right of the word Shape to bring up the drop downs. From the list towards the bottom you will find the copyright symbol. Click on that to make it active.
- You need to have your layers palette open. Create a new blank layer by clicking on the 2nd to the last icon on the bottom of the layer palette next to the trash can icon.
- Click on the Foreground color swatch in the Toolbar on the left hand side of your screen and select a light grey for your Foreground color.
- To place the 'C' copyright shape to the image press the 'Shift' button on my keyboard. While holding this key down click on the C in the actual tool bar at the top of the screen. It will look like there is nothing on the screen but while still holding the shift button down drag the cursor that you moved the 'C' to the image downward and to the right. This is how you will size the 'C'. The release both the shift and cursor.
- Now click on the Layer Style icon at the bottom of the layer palette which is the 2nd icon that says fx. Click on Bevel and Emboss from the drop down list and then click on OK.
- Now use the Type tool from the left hand side Toolbar making sure the color watch still is the light grey color. Placing the text bar on the bottom of your image type the word Copyright and your business name. I like to use the font Casmira.
- Repeat the Layer Style as listed in #10 above.
- In both the 'C' and the text layer change the layer mode at the top left hand side of the layer palette box from Normal to Hard Light. This will make the stamps transparent.
- Change the 'C' copyright layer to about 30 to 35, keeping the stamp visible but not so much that person viewing the image can't get a good look. But making it hard for someone else to remove the stamp.
- On the text layer I keep the opacity higher as it's on the bottom of the image and I want my business name to be more visible.
- The last step is to stop the action that we are creating. To do this you click on the first icon that is simply shaped like a box at the bottom of the Actions palette.
- Once completed you will want to flatten the layers and I usually run the Image Processor from the File tool named Scripts for my web images. But that will be another blog on another day. There is nothing like Photoshop automation.
You might have to move the copyright symbol or your text layer to fit the image but you will have the layers ready for you to make your adjustments.
Hope you found this helpful!

 RSS Feed