wesdotphotography.com
visit us:
  • Home
  • Autos and Vehicles
  • Nature and Animals
    • Animals >
      • Animals
      • Canines
      • Cats
    • Birds >
      • Birds
      • Eagles and Osprey
      • Hummingbirds
      • Owls
      • Tall Birds
    • Equine >
      • Everything Horses
      • Lipizzans
      • Wild Horses
    • Flora
  • Pacific NW
    • Japanese Gardens
    • Mountains
    • Night Skies
    • Ocean
    • Pacific Northwest
    • Portland
    • Waterfalls and Streams
  • People
  • Travels
    • Alaska
    • California
    • Desert Southwest
    • France
    • Northeast
    • Rocky Mountain States
    • Yellowstone and Tetons
  • Unique Art
    • Abstracts
    • Triptychs
  • About Us
    • Blog
    • Forum
    • Contact Us
    • Legal

ADAMSKI EFFECT – PART I

6/22/2023

0 Comments

 
Picture
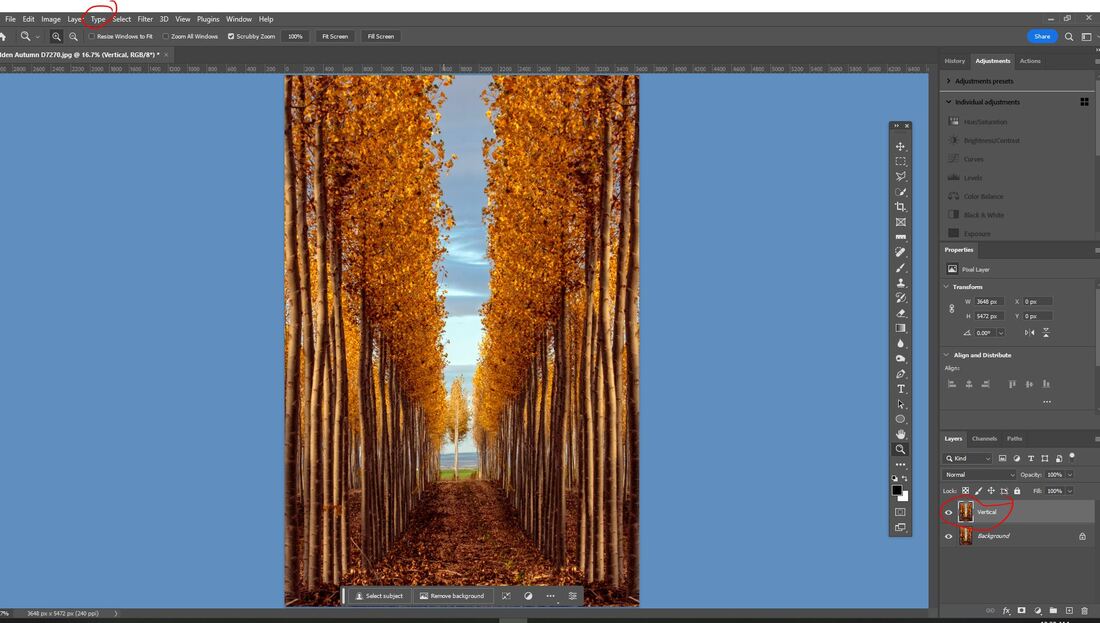
First step is to create a duplicated layer from the background layer. To do this right click on the background layer and select Duplicate Layer or with the PC keyboard shortcut do a Control J. As I am only doing a vertical blur there is only one duplicated layer which will be renamed 'vertical'.

Picture
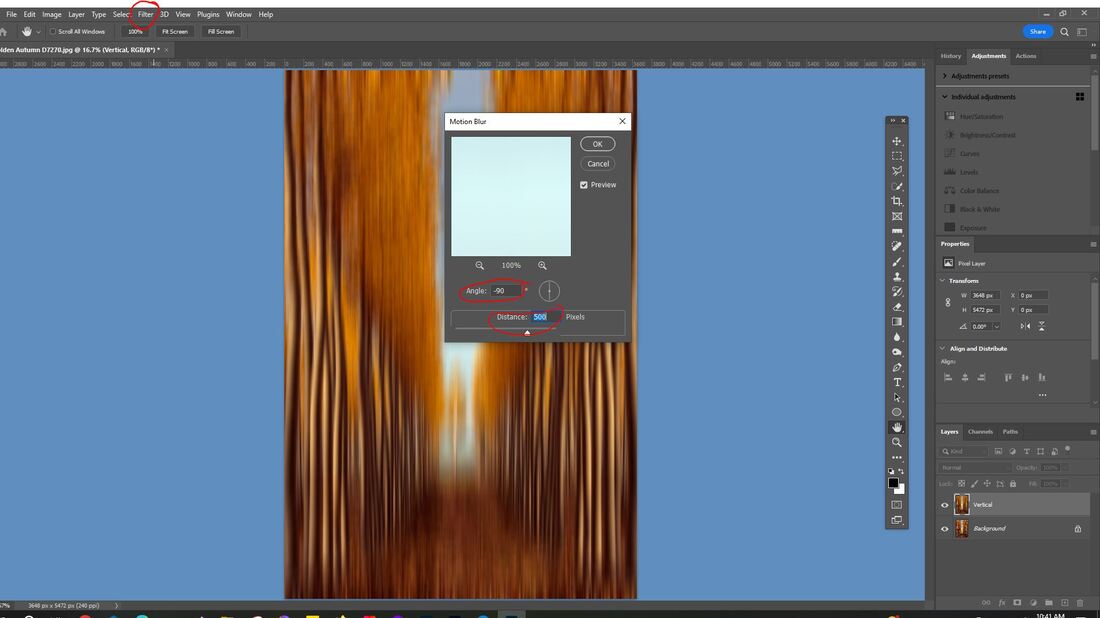
With the Vertical layer selected go to the Filter Tab, from the drop down box select Blur then Motion Blur. Type -90 in the Angle field to make the blur vertical. I will use 500 in the Distance slider for this image. This is purely your choice. The higher the number the more blur. Then click OK.

Picture
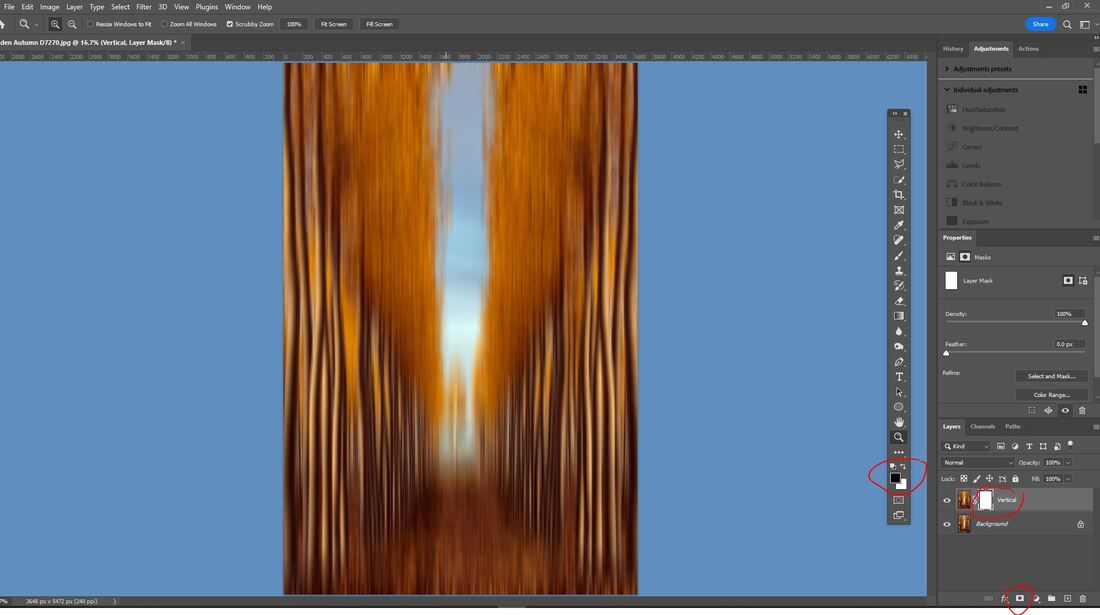
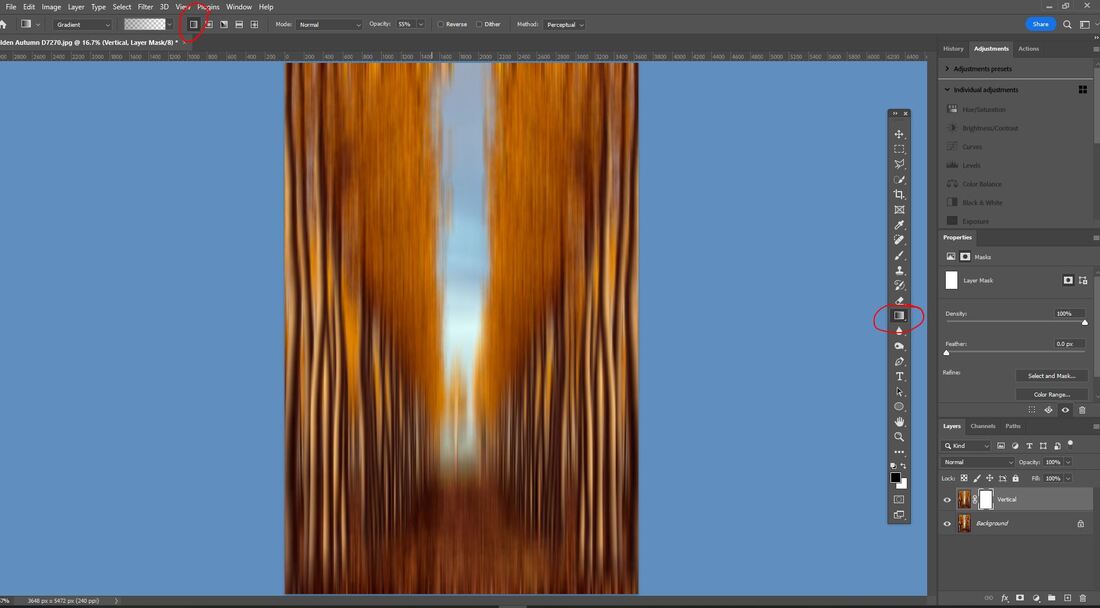
Add a Layer Mask by clicking the icon in the bottom of the Layers Palette. The mask should be white and the foreground color palette should be black.

Picture
Select the Gradient Tool in the tools bar or with the PC keyboard press the letter 'G'. Make sure the 1st Icon next to the Gradient bar is selected. It is called the Linear Gradient.

Picture
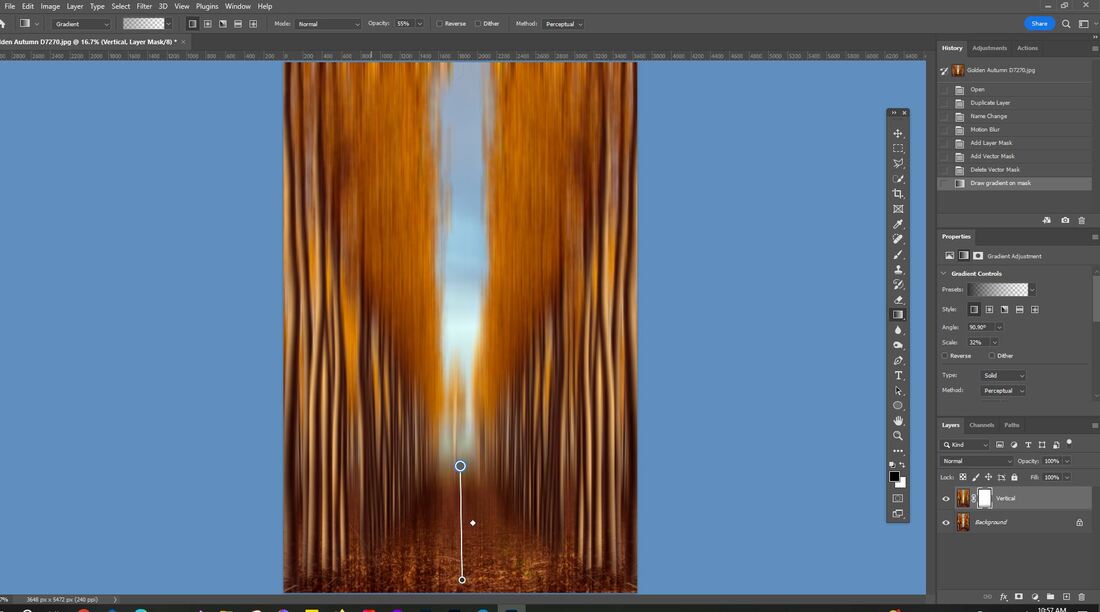
Making sure the Mask is selected on the Vertical layer hold the Shift key and click near the middle bottom of the image and drag up a slowly to maybe an inch or so. You will see the lower portion of the image being revealed.

Picture
Using a large soft black brush set the Opacity to 10-15%. Start brushing on the Mask at the bottom and brush towards the top until you have the look you want. The bottom should be black and fading to gray towards the top of the selection. Continue brushing along the edges of the blurred area and the trees. Toggle between the black brush to reveal and the white brush to bring the blur back if you've removed too much. Also toggle between a lower opacity and 100% opacity to see the progress. This is probably the most time consuming part of the edit.

Picture
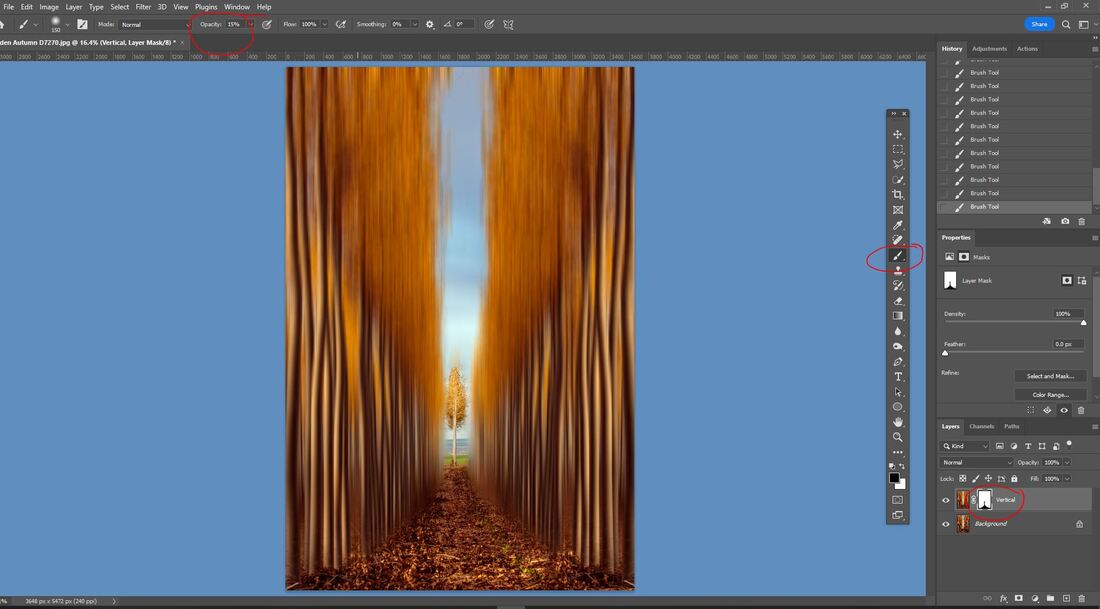
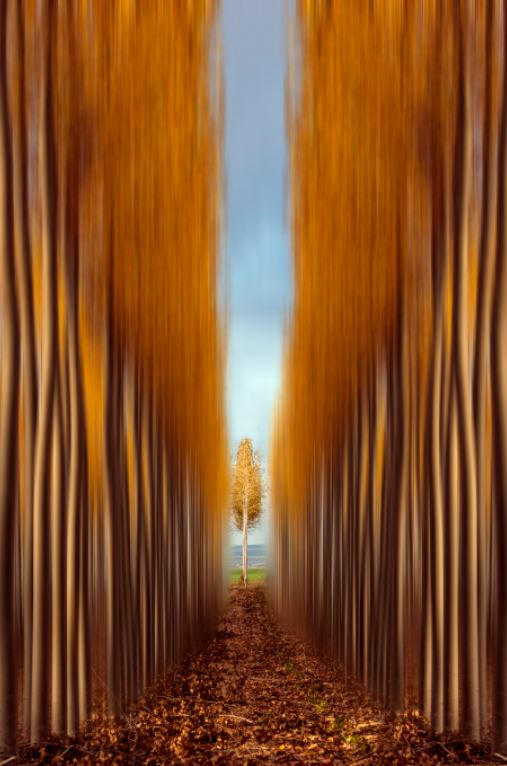
Flatten the layers and do a Save As naming the file. Here is the finished project.

Picture
0 Comments

Your comment will be posted after it is approved.


Leave a Reply.

    Our Flickr Photos

    Author

    Name:
    Wes & Dotty Weber

    Occupation:
    Photographers at Heart

    Favorite Camera:
    Canon  5DMarkIII and Canon 7DMarkII

    Favorite Subjects:
    Absolutely everything.

    Favorite Vacation Spot:
    Everywhere we’ve been has it’s own special beauty and some places like Yellowstone National Park and the Desert Southwest can be unlike anywhere else.  But to name a favorite is hard as we’ve not seen everything, yet.  

    Personal Motto:
    "Everywhere you look is a great image if you look closely”


    Archives

    July 2024
    February 2024
    June 2023
    May 2023
    April 2023
    April 2022
    November 2018
    January 2018
    November 2016
    December 2015
    July 2015
    January 2015
    February 2014
    November 2013
    July 2013
    June 2013
    May 2013
    February 2013
    January 2013
    November 2012
    September 2012
    August 2012
    March 2012
    February 2012
    December 2011
    October 2011

    RSS Feed

    Categories

    All
    Canvas
    Commerce
    Domain
    Email
    Fine Art America
    Framed
    Gallery Wraps
    Greeting Cards
    New
    Outage
    Prints
    Registrar
    Shopping
    Website
    Weekly
    Wesdotphotography

Copyright © Since 2000, WesDotPhotography All Rights Reserved.