wesdotphotography.com
visit us:
  • Home
  • Autos and Vehicles
  • Nature and Animals
    • Animals >
      • Animals
      • Canines
      • Cats
    • Birds >
      • Birds
      • Eagles and Osprey
      • Hummingbirds
      • Owls
      • Tall Birds
    • Equine >
      • Everything Horses
      • Lipizzans
      • Wild Horses
    • Flora
  • Pacific NW
    • Japanese Gardens
    • Mountains
    • Night Skies
    • Ocean
    • Pacific Northwest
    • Portland
    • Waterfalls and Streams
  • People
  • Travels
    • Alaska
    • California
    • Desert Southwest
    • France
    • Northeast
    • Rocky Mountain States
    • Yellowstone and Tetons
  • Unique Art
    • Abstracts
    • Triptychs
  • About Us
    • Blog
    • Forum
    • Contact Us
    • Legal

Adding Background Light in Lightroom and Saving as a Preset

4/19/2023

0 Comments

 
Picture
Here is the original image:
Picture
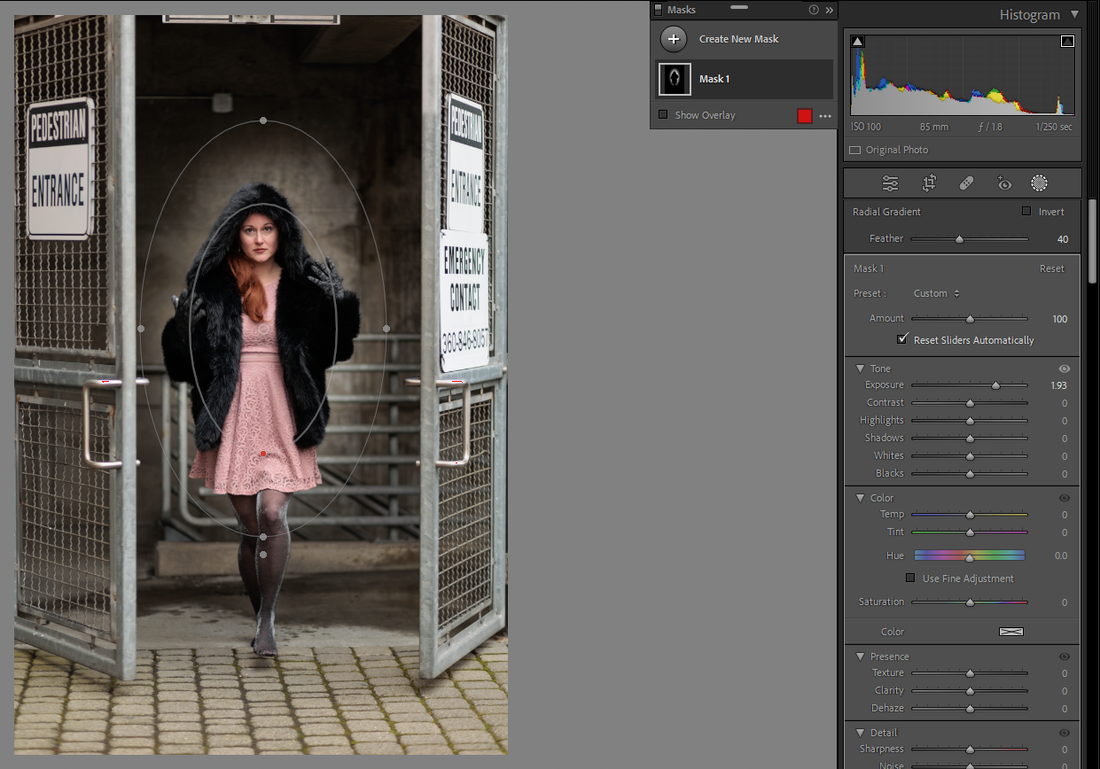
First Step is to add a Radial Gradient mask.
Picture

Then click and drag the Radial Gradient mask to your liking. The mask area will show as red.
Picture
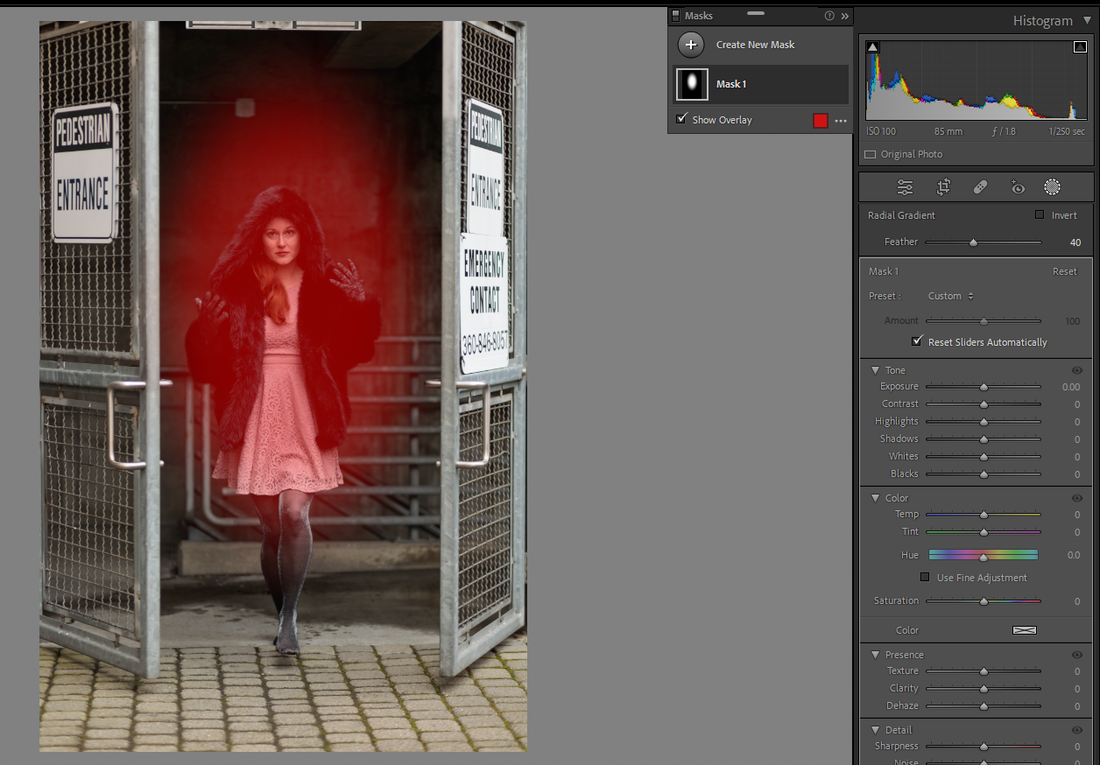
Then change the lighting to either darken or lighten. In this case it is lighten.

Picture
To make the light show only behind the girl click on Mask 1, then click on subtract which will bring a drop down box. Click on 'Select Subject' not 'Select People'. If there was a prop like a chair or if she is holding something it will not be selected in the mask unless you 'Select Subject'.

Picture
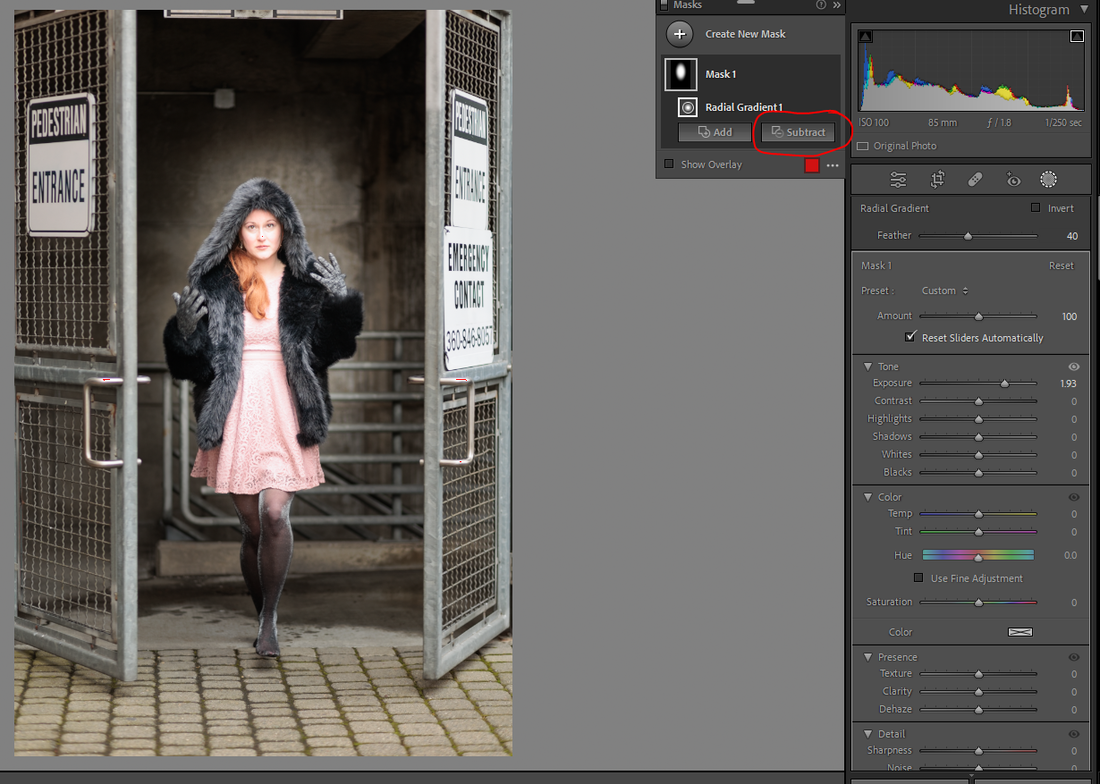
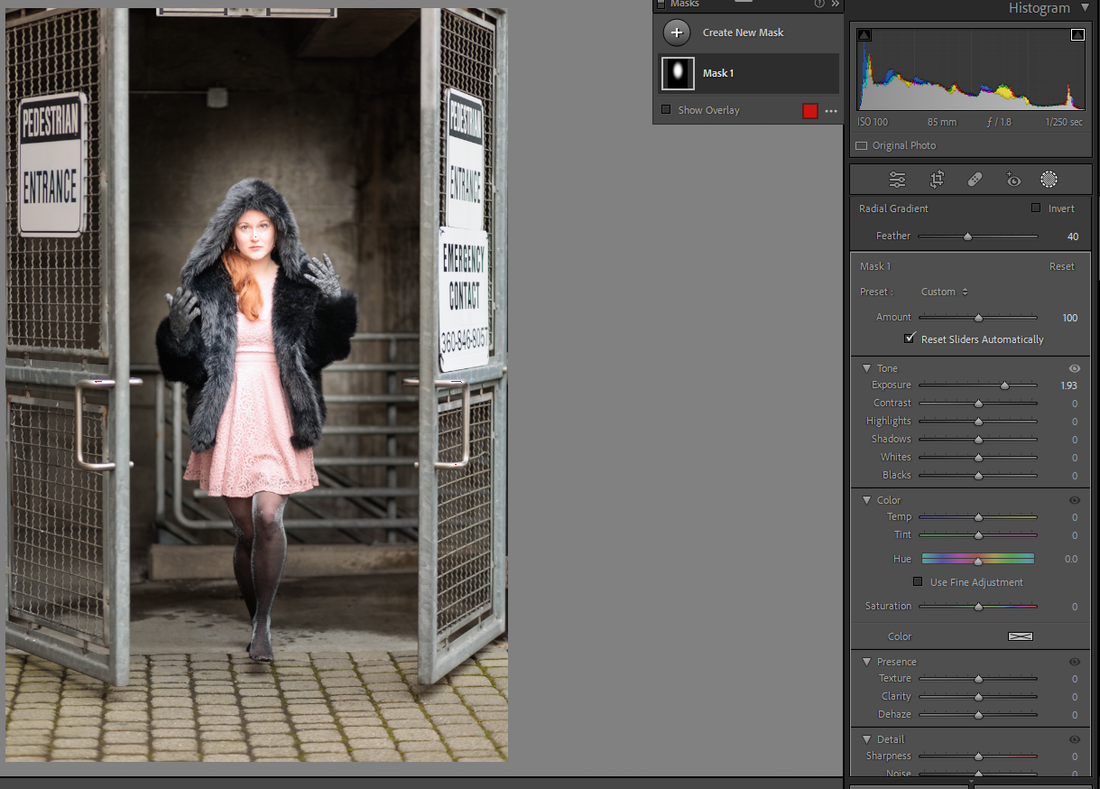
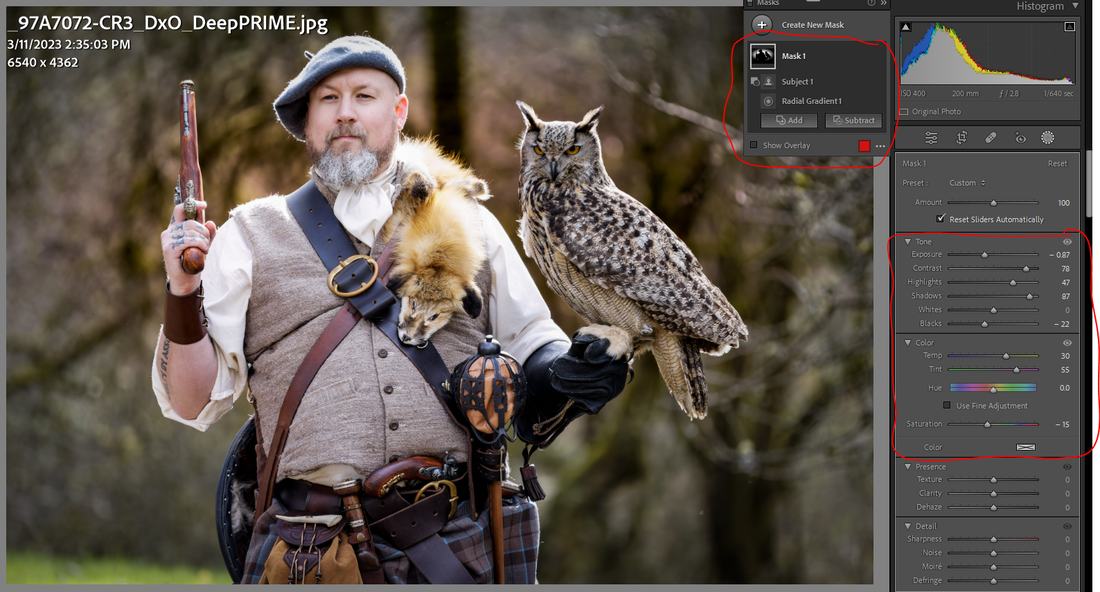
Now the subject is no longer lit by the Radial Gradient but the area behind her is.

Picture
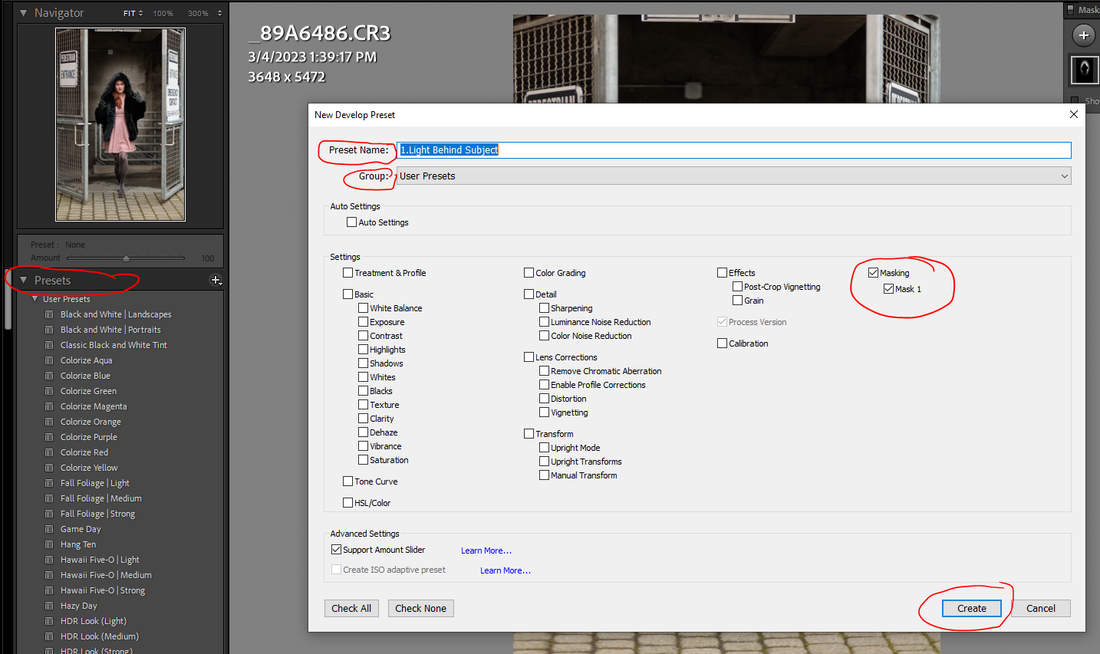
At this stage save as a Preset so it can be used on other images. Rename it something like 1.Light behind Subject, select 'User Presets' as Group and only check Masking. I add the '1' to the Preset name so it will be at the top of my list. It can always be renamed after it is saved if you want to.

Picture
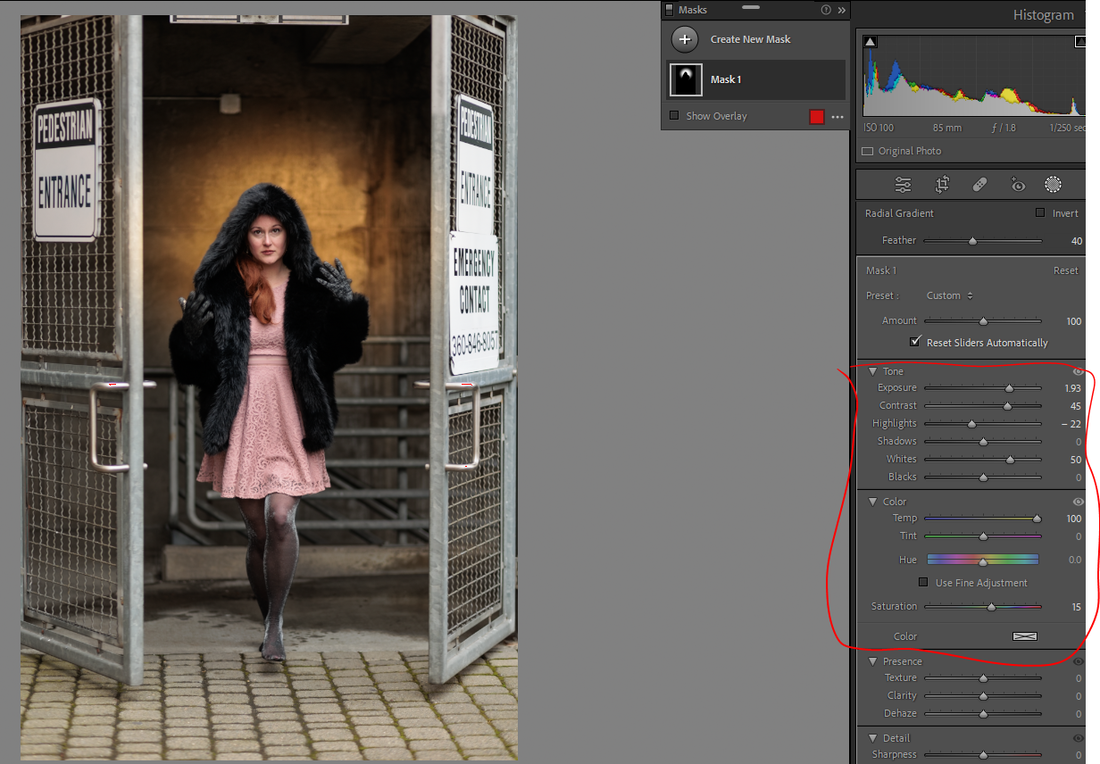
The size, shape, and placement of the mask can be changed by clicking on the mask in the image and making your adjustments to taste. You can also make many other changes to the mask like seen below:

Picture
And since the first steps before adjustments have been saved as a Preset it can now be added to other images and all the same adjustments as shown above can be made.

Here is a different image before the Preset was added:

Picture
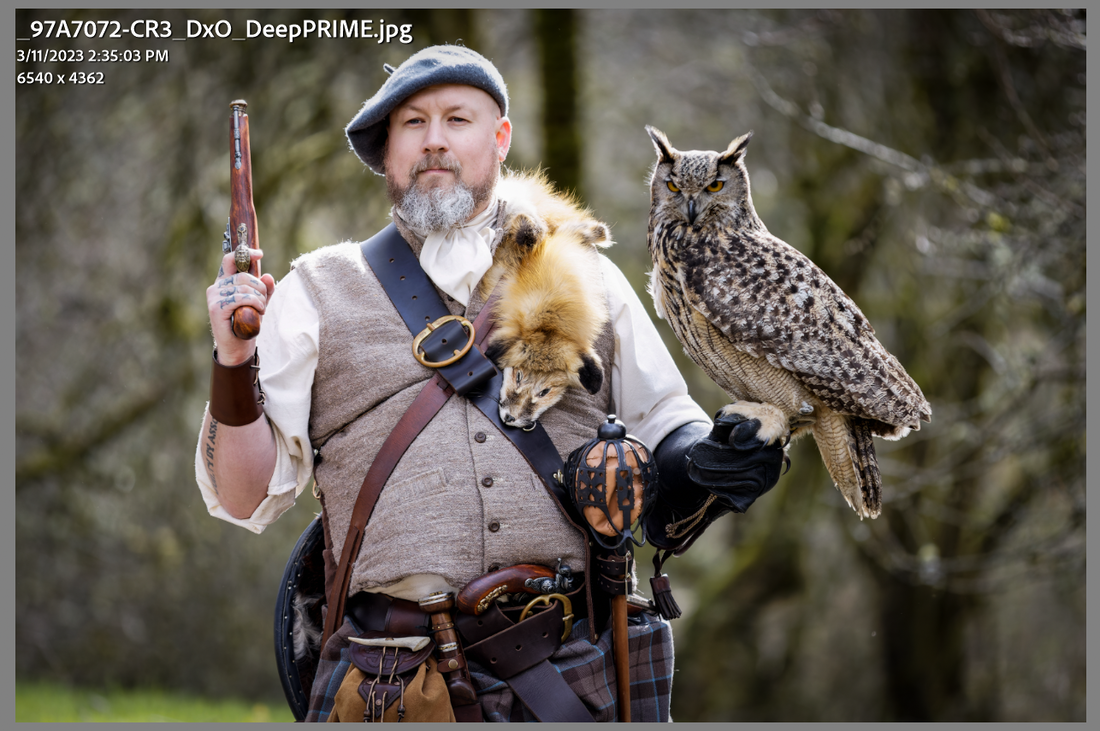
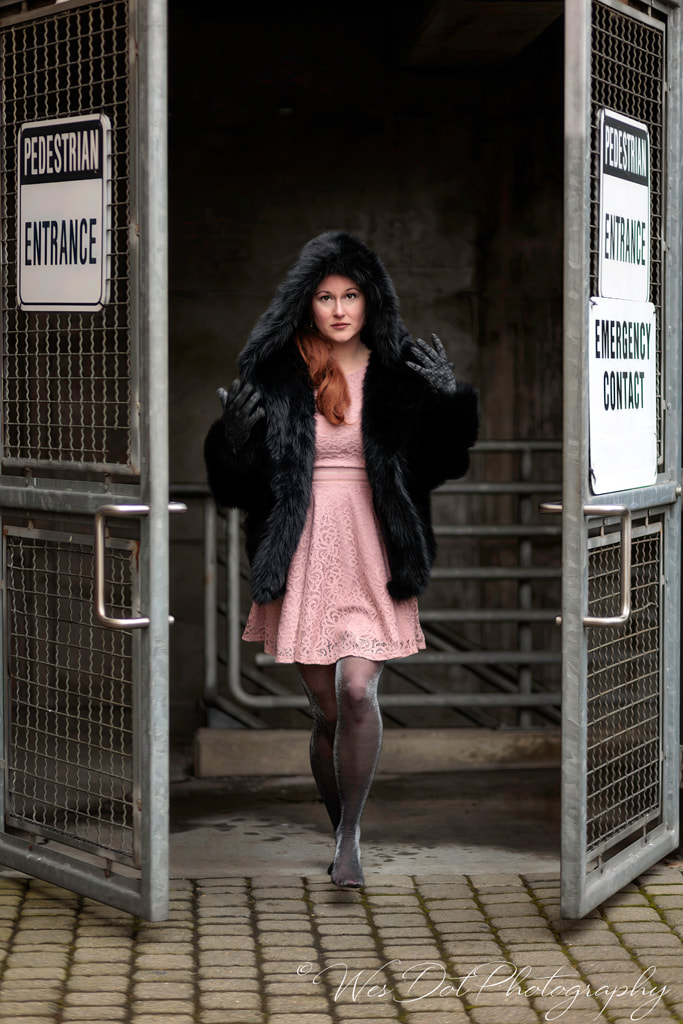
And the same image after adding the Preset by one click and then making some adjustments to show the difference.

Picture
Thank you for taking the time to check out my tutorial.  And if you enjoyed it please comment and follow my Facebook page where I will be posting a link to my Blog. 
I will try to do more tutorials as I find things that I also want to remember and use.
Thank you for your support.
0 Comments

Your comment will be posted after it is approved.


Leave a Reply.

    Our Flickr Photos

    Author

    Name:
    Wes & Dotty Weber

    Occupation:
    Photographers at Heart

    Favorite Camera:
    Canon  5DMarkIII and Canon 7DMarkII

    Favorite Subjects:
    Absolutely everything.

    Favorite Vacation Spot:
    Everywhere we’ve been has it’s own special beauty and some places like Yellowstone National Park and the Desert Southwest can be unlike anywhere else.  But to name a favorite is hard as we’ve not seen everything, yet.  

    Personal Motto:
    "Everywhere you look is a great image if you look closely”


    Archives

    June 2023
    May 2023
    April 2023
    April 2022
    November 2018
    January 2018
    November 2016
    December 2015
    July 2015
    January 2015
    February 2014
    November 2013
    July 2013
    June 2013
    May 2013
    February 2013
    January 2013
    November 2012
    September 2012
    August 2012
    March 2012
    February 2012
    December 2011
    October 2011

    RSS Feed

    Categories

    All
    Canvas
    Commerce
    Domain
    Email
    Fine Art America
    Framed
    Gallery Wraps
    Greeting Cards
    New
    Outage
    Prints
    Registrar
    Shopping
    Website
    Weekly
    Wesdotphotography

Copyright © Since 2000, WesDotPhotography All Rights Reserved.